Working with several warehouses
Summary
When your account has more than one warehouse, almost everything you see is filtered by the active warehouse, the one shown in the top bar: customers, stock, receipts, shipments, invoices, reports, configuration. Each warehouse has its own modules, document numbers, services, templates and notifications. People, on the other hand, belong to the account: the same user can work in several warehouses with the same role.
This article explains what belongs to each warehouse, how people are spread across them, which warehouse a customer belongs to, how goods move from one to another and what can be seen for all of them at once.
What belongs to each warehouse and what is shared
| Per warehouse | Shared by the account |
|---|---|
| Modules on, time zone, daily inventory hour, default notification language | The contracted plan and the maximum warehouses and users |
| Customers (each belongs to one), products, locations, zones, stock | Users, their roles and their extra permissions |
| Receipts, advance ship notices, shipments, cross-docks, visits | The Roles and permissions matrix |
| Docks, yards, special job types, kiosks | The system appearance (except the warehouse color theme) |
| Service catalog and its currencies, accessorials, quotes and their templates | |
| Charges, invoices, receivables | |
| Document numbers, document templates, KPIs, notifications and emails, SMS / WhatsApp |
Before you start
- Creating warehouses and seeing all of them is for the Super Admin (admin menu › Warehouses), within the plan’s maximum.
- Giving access to a warehouse is done on the user record, with the configure users permission (Super Admin out of the box).
- Transferring between warehouses needs the transfer inventory permission (Super Admin, Admin and Supervisor), the inventory module and access to both warehouses.
The warehouse switcher
If you have more than one warehouse, you are asked to pick one when you sign in. After that you switch with the warehouse name in the top bar: pick one in «Available Warehouses» and the system takes you to your home screen already in the new one, with a notice. Switching changes the data, the menu (according to the modules on), the configuration you edit and the cut of the day, which uses the warehouse’s time zone. See Changing language and warehouse.
Users in several warehouses
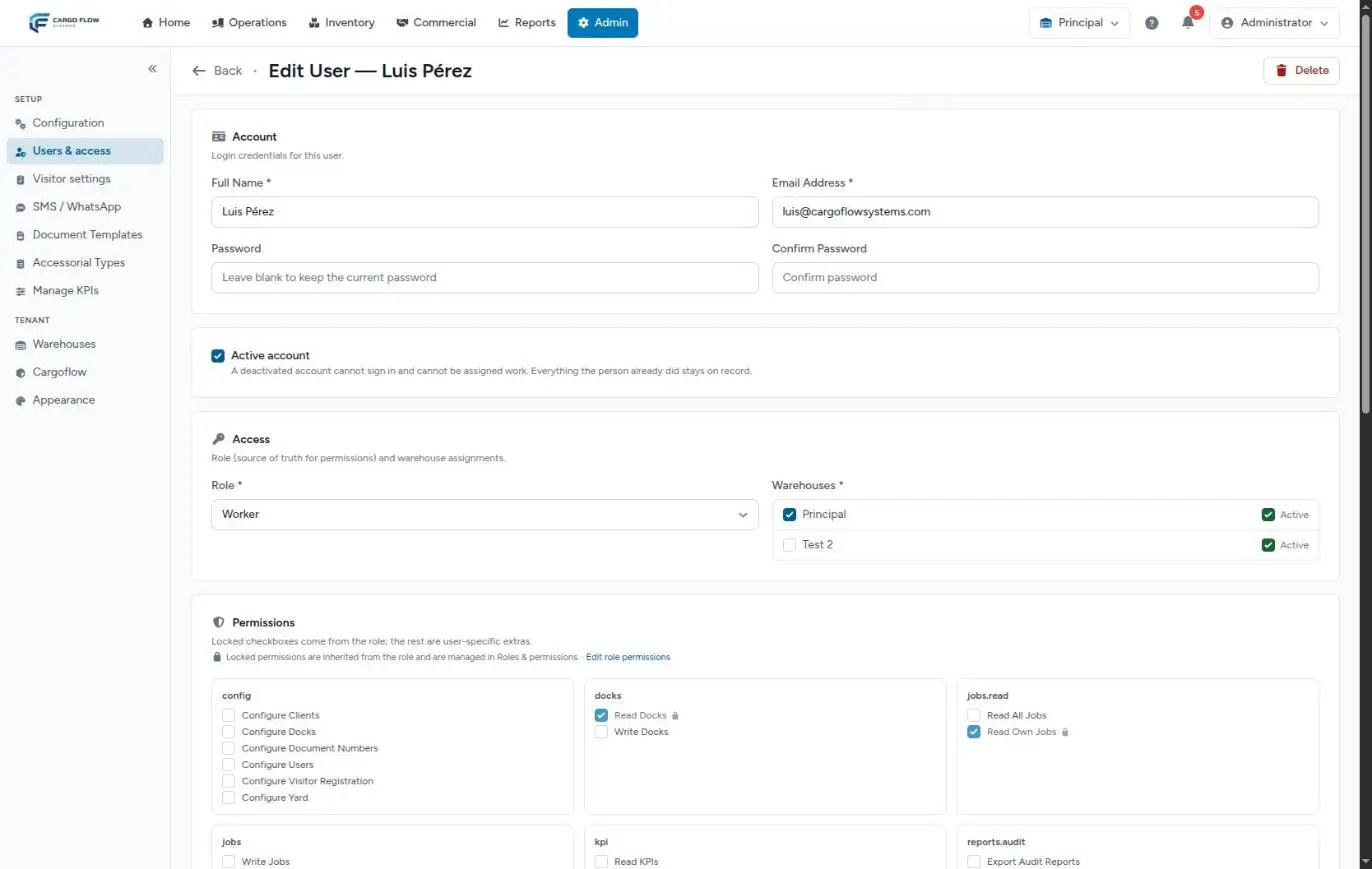
- Open the record in Users & access.
- Under Access › Warehouses, tick each warehouse they will work in. The Active checkbox on each removes access to that warehouse without touching the others.
- Pick their role. It is the same for all their warehouses.
- Save. The person now sees the switcher with their warehouses.
- The Super Admin has every warehouse without being assigned.
- A user administrator who is not a Super Admin only sees the people of their active warehouse and can only assign warehouses they have access to.
- Under admin menu › Warehouses, the Super Admin can see each warehouse’s users and give each one a role in that warehouse. That role grants no permissions: it decides who gets the bell alerts in that warehouse and who shows up to be assigned jobs there. See Modules, permissions and access.
Customers and warehouses
Each customer has a home warehouse: the active warehouse when they were created, or the one of the quote they came from. That is where they appear in the customer list and in the receipt, shipment, job and billing selectors.
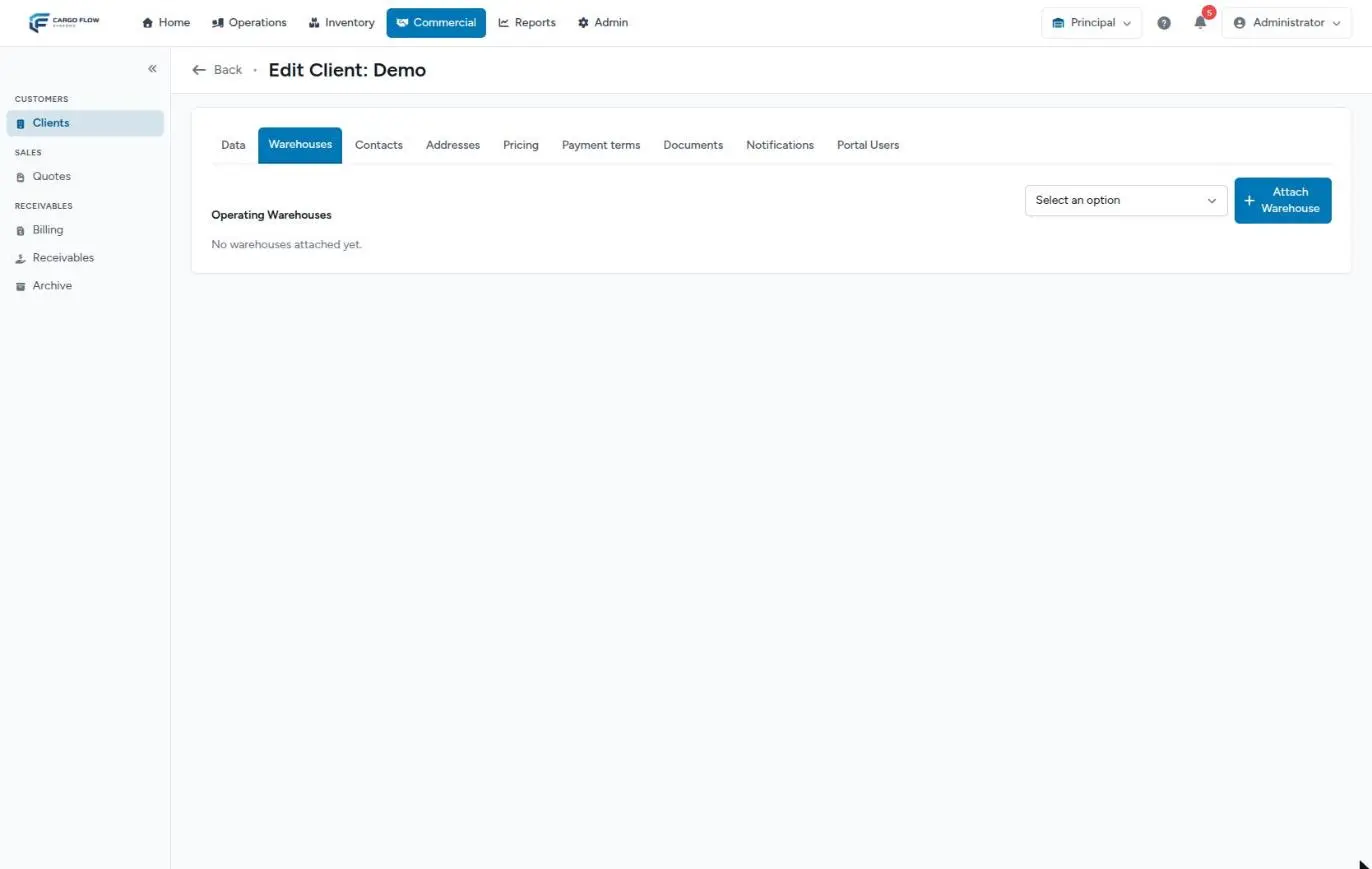
The Warehouses tab on their record («Attach Warehouse») adds other warehouses to the customer. In every active attached warehouse the customer also appears in the team’s list and selectors, and in their portal they can switch to that warehouse to view, notify and request. You can only attach warehouses you have access to, and detaching keeps the history.
Setting up each warehouse
A new warehouse starts empty (apart from a first yard the system creates for it). With it selected, go through:
- Warehouse data (Super Admin, admin menu › Warehouses): name, code, time zone, daily inventory report hour, default notification language.
- Modules in the Cargoflow panel.
- Document numbers: save the screen even if you keep the factory formats. See Document numbers and documents across the flow.
- Services and their currencies: the catalog is not copied from another warehouse.
- Accessorials, docks, yards, special job types, visitors and kiosks.
- Document templates and the KPI dashboard.
- Notifications and emails (operational alerts and internal invoice copy) and SMS / WhatsApp, each with its limits. See Warehouse notifications and emails.
The recommended order is in the Quick setup guide.
Moving goods between warehouses
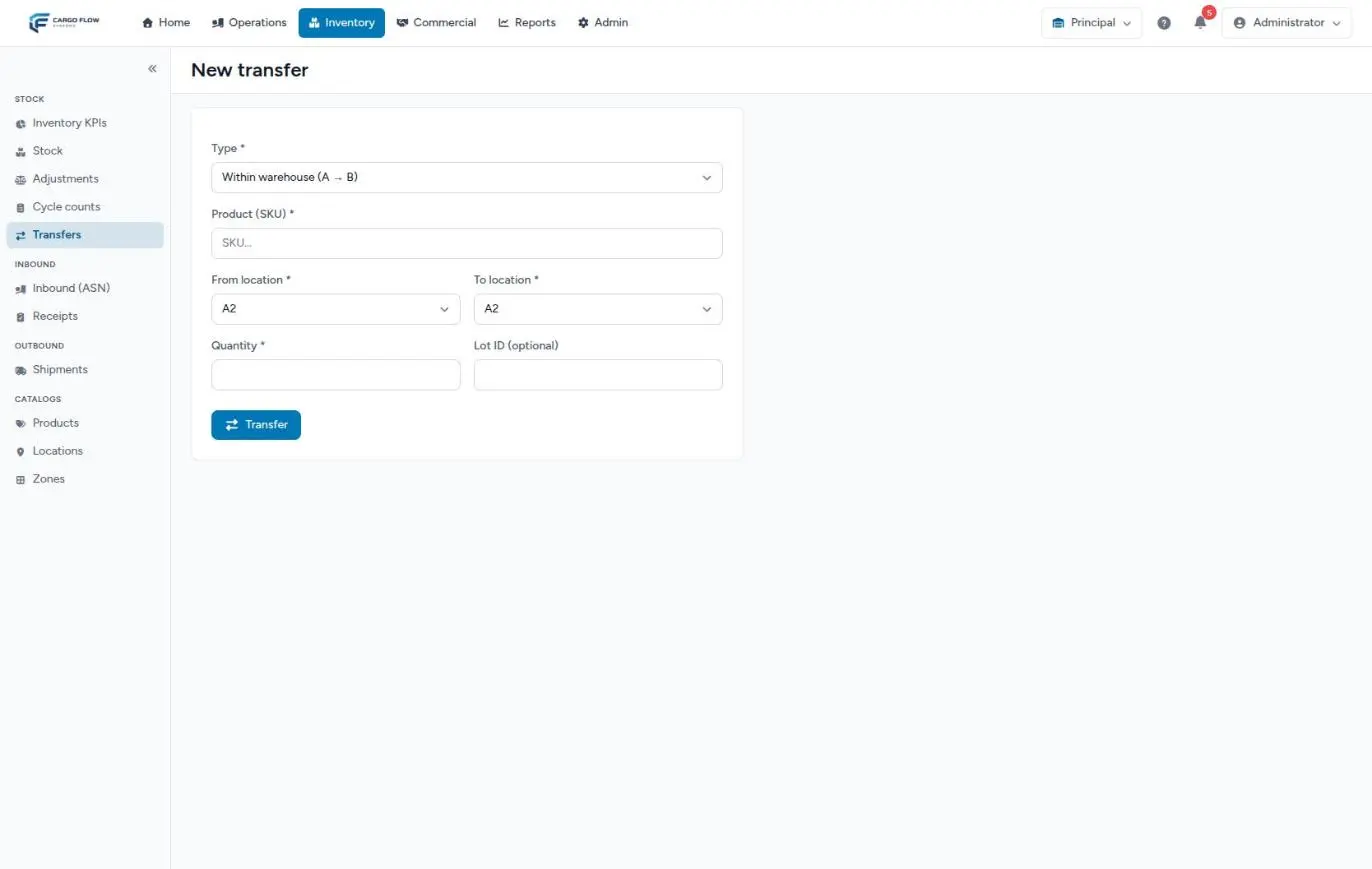
- In the source warehouse, Inventory › Transfers › New transfer, type «To another warehouse».
- Pick the product, source location, quantity and lot if it applies, and the destination warehouse (only active warehouses you have access to are listed).
- Transfer. The goods leave the source immediately and stay in transit: they count in neither warehouse’s stock.
- In the destination warehouse, Inventory › Transfers shows the incoming tray. Pick the location in «Receive into» and click Receive. It is received in full.
Each step leaves its Transfer movement in the history of its own warehouse. There is no button to cancel a transfer in transit: if it was a mistake, the destination receives it and sends another one back.
See Stock transfers.
Reports across warehouses
- Reports, the home dashboard and KPIs show only the active warehouse. To compare warehouses, download the same report in each one.
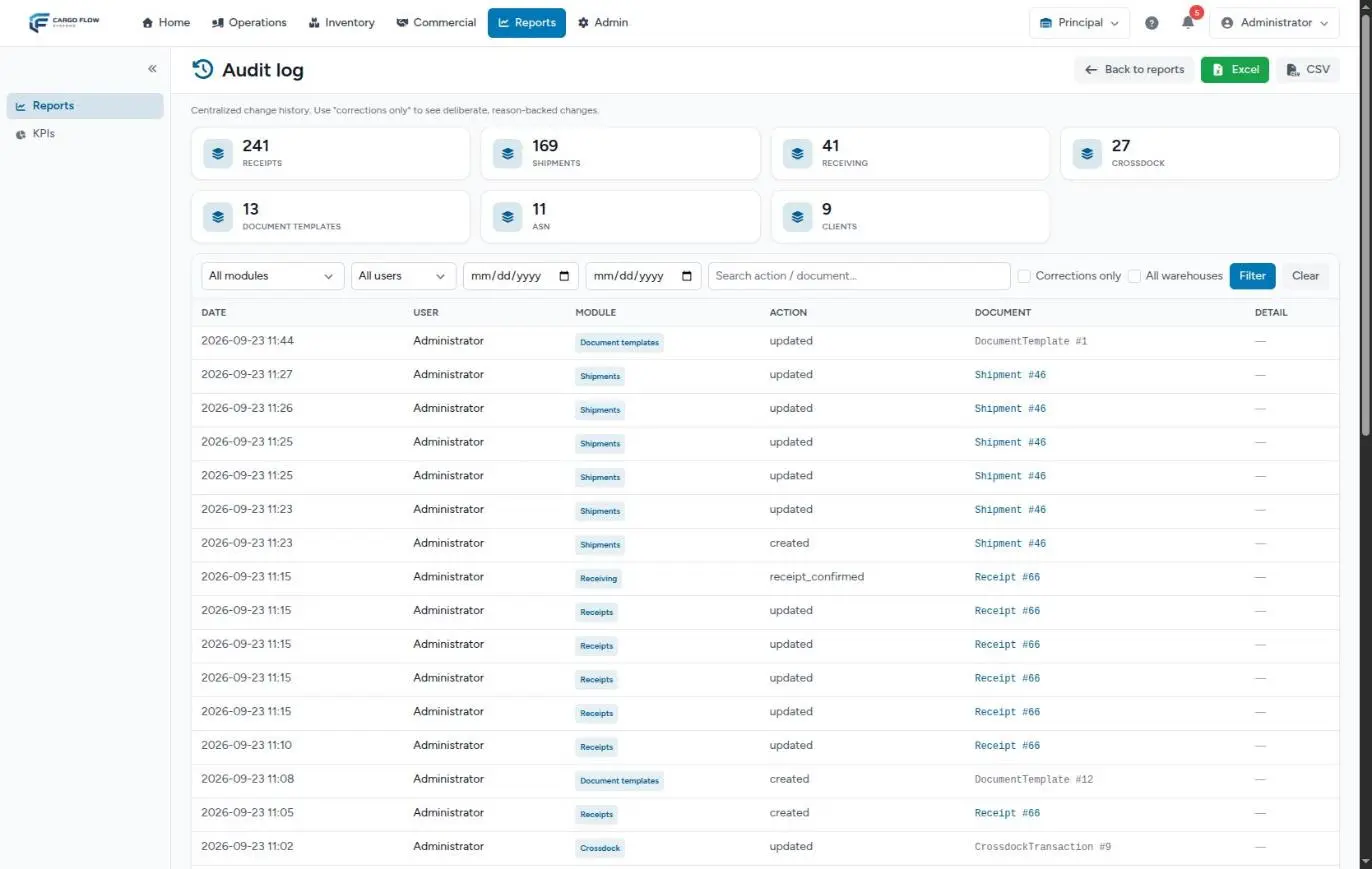
- The Audit report has an «All warehouses» checkbox, for the Super Admin only.
- The Users list has a warehouse filter, with an all option, for the Super Admin.
- The Cargoflow panel shows the account’s warehouses, their modules and users.
Example: opening a second warehouse
The account runs the Principal warehouse and opens Test 2 in another city, with its own time zone.
| Step | Who | What they do |
|---|---|---|
| 1 | Super Admin | Creates Test 2 with its code, its time zone and the daily inventory at 8:00 AM |
| 2 | Super Admin | In Cargoflow turns on Docks, Inventory, Receiving, Shipping and Billing in Test 2 |
| 3 | Super Admin | Gives Test 2 access to Ana López (Admin) and Carlos Ruiz (Worker); deactivates Principal for Luis Pérez because he is moving |
| 4 | Ana López, in Test 2 | Saves the document numbers, loads the service catalog, creates docks and locations |
| 5 | Ana López, in Test 2 | Creates Central Warehousing as a Test 2 customer, with code CENTRAL, rates and contacts |
| 6 | Ana López, in Test 2 | Sets up Test 2 notifications and emails and runs a receipt-to-invoice test |
Central Warehousing will get their daily inventory at 8:00 AM Test 2 time, and their invoices use Test 2’s numbers.
What can go wrong
I cannot find a customer, receipt or invoice I know exists.
- It belongs to another warehouse. Switch warehouses and look there.
I attached the customer to the second warehouse and they do not appear in its selectors.
- Check on the Warehouses tab that the link is Active. See Customers and warehouses.
I cannot find the customer’s SKUs in the second warehouse.
- Each warehouse has its own catalog: set them up there. See Set up a SKU step by step.
When I sign in it says I have no access to any warehouse.
- You have no warehouses assigned, or all have the Active checkbox unticked.
The destination warehouse is not offered when transferring.
- It is inactive or you have no access to it.
I do not see the transfer to receive it.
- You are in the wrong warehouse: the tray only shows what is coming to the active warehouse.
Bell alerts reach people who do not work in that warehouse, or miss people who do.
- Check that person’s per-warehouse role under admin menu › Warehouses › users, and the recipient roles in that warehouse’s Notifications and emails.
I set up document numbers and the other warehouse did not change.
- They are per warehouse: repeat in each one.
Best practices
- Give warehouses names that are easy to tell apart at a glance in the top bar.
- Set the right time zone from day one: every report’s «today» depends on it.
- Deactivate access to a warehouse instead of removing it when someone stops working there temporarily.
- Receive transfers the same day: in transit, the goods are in no stock.
- When you finish setting up a new warehouse, run a full receipt-to-invoice test in it.
Frequently asked questions
Can someone be a supervisor in one warehouse and a worker in another?
Not in permissions: the role is the same for all their warehouses. What does change per warehouse is who gets alerts and who is assigned jobs (the per-warehouse role), and access to each one. If they truly need different permissions, use two accounts.
Does each warehouse have its own time?
Yes. The warehouse’s time zone cuts the day on the dashboard, in reports, in daily storage and in the daily inventory hour.
Who creates a new warehouse?
The Super Admin, under admin menu › Warehouses, as long as the plan allows another warehouse. If you reached the maximum, write to us.
Need help?
If something did not work as expected, our support team can help you.
Was this article helpful?