Locations and zones
Overview
The warehouse is described on two levels: zones (large areas: storage, receiving, shipping, returns…) and, inside them, locations (the exact spot where goods are placed). Every stock line lives in a location, so this catalog must be ready before receiving: a receipt will not confirm if a line with quantity has no location.
Both catalogs are under Inventory › Locations and Inventory › Zones (Catalogs group). They can also be created from the inventory dashboard and from Stock with Create Zone and Create Location, and from the location search in forms, which offers to create one that does not exist.
Before you start
- Permission: Manage Inventory Catalogs (Super Admin and Admin).
- Module: Inventory enabled for the warehouse.
- The right active warehouse: zones and locations belong to each warehouse; codes only need to be unique within it.
- A floor plan or sketch with aisles, racks and levels: define the code scheme before entering anything.
Zones
The zone list shows the code, name, zone type, how many locations it has and whether it is active. To create one, use Create Zone and fill in:
- Code (required) — up to 16 characters, unique in the warehouse.
- Name (required, up to 100 characters) and Description.
- Zone type (required) — Storage (preselected), Receiving, Shipping, Staging, Returns or Quarantine.
- Active — inactive zones do not appear when creating locations or in the Stock zone filter.
When creating, you land on the new zone’s edit screen; when editing, you go back to the list.
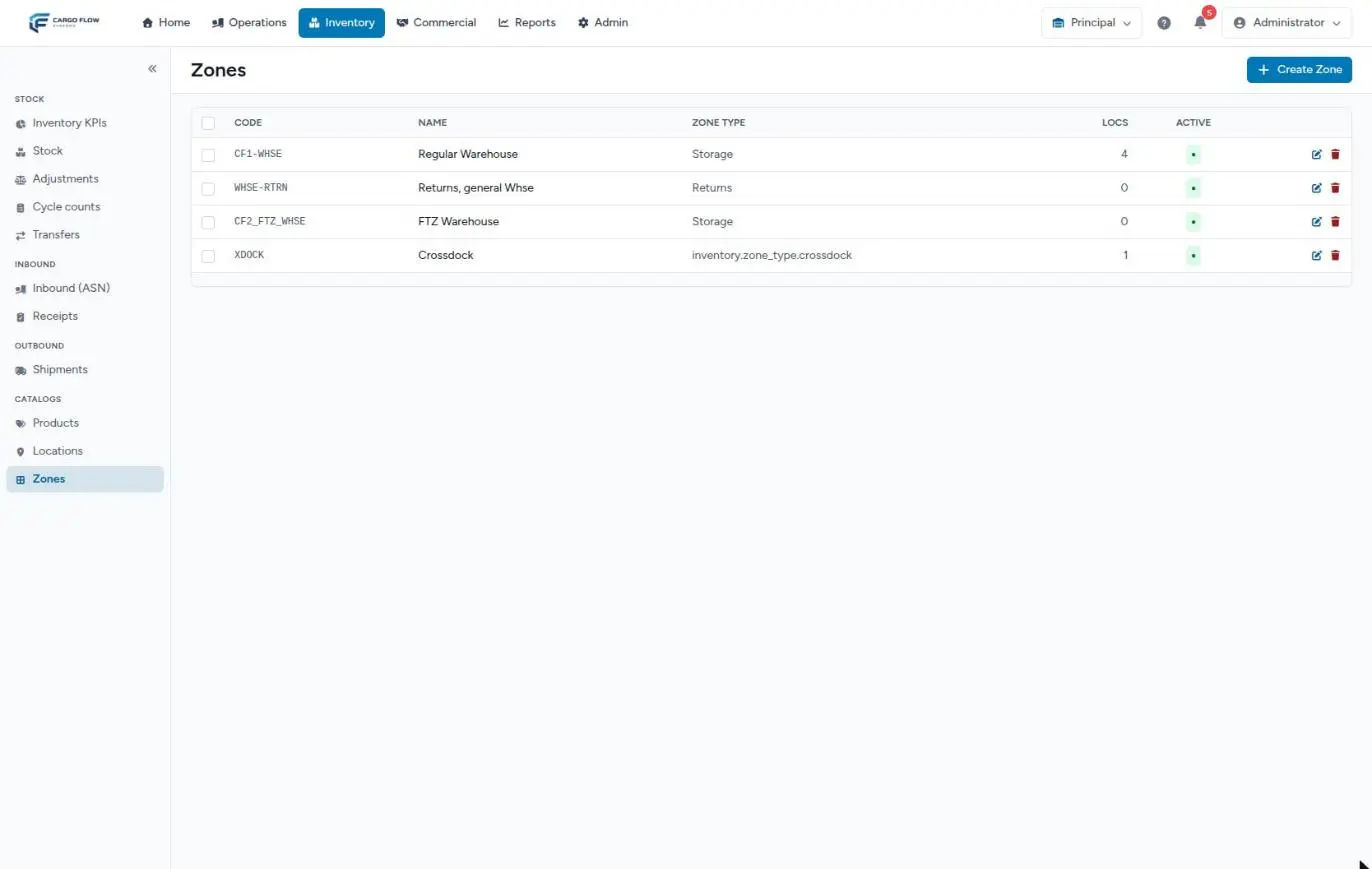
Today the zone type is informational for the team: it organizes the layout but does not change what gets reserved or charged. What does change operations is each location’s data (type, active and pickable).
Locations
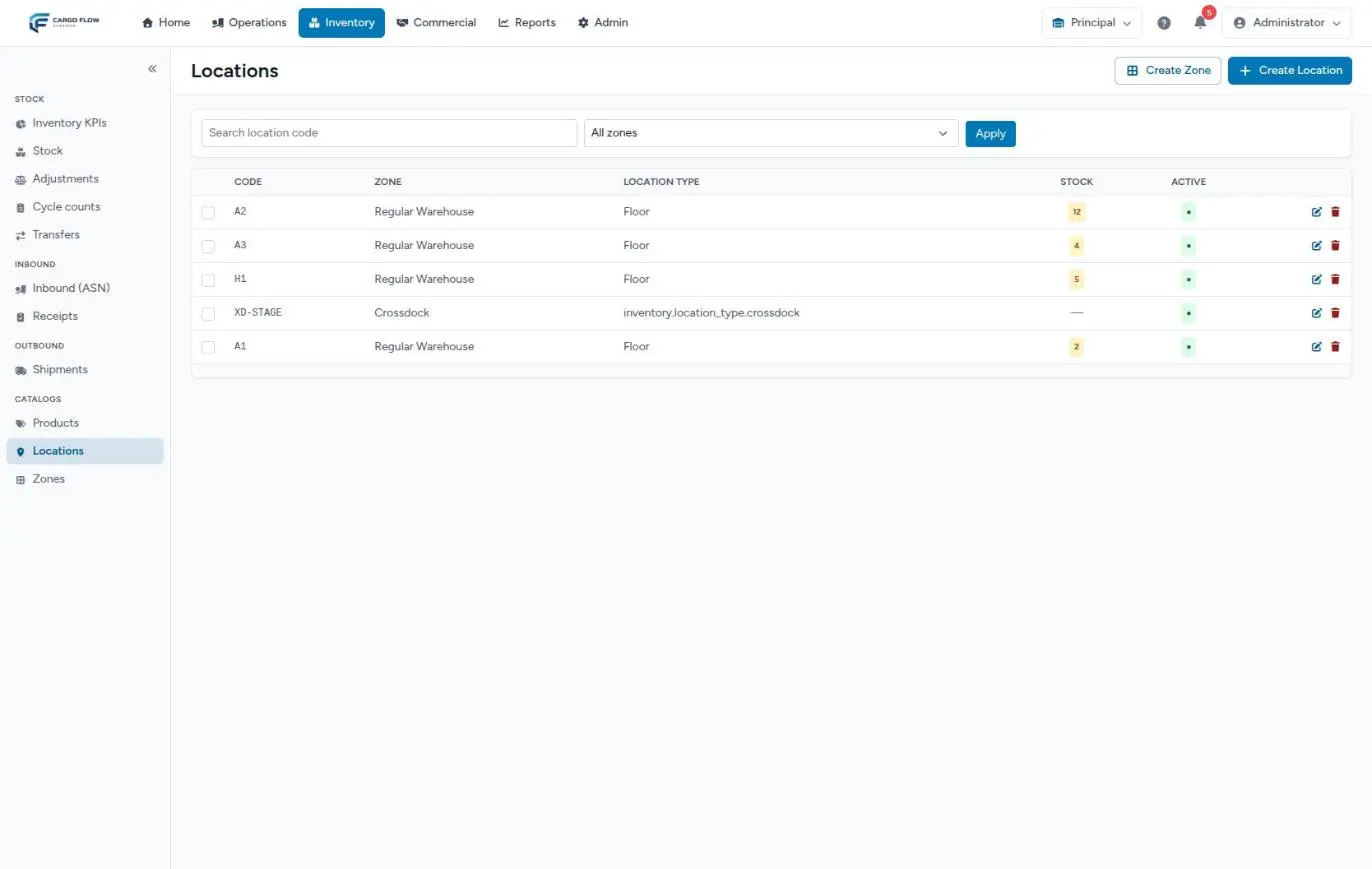
The location list has a code search and a zone filter. It shows the code, zone, location type, how many lines with stock it has and whether it is active.
Creating a location
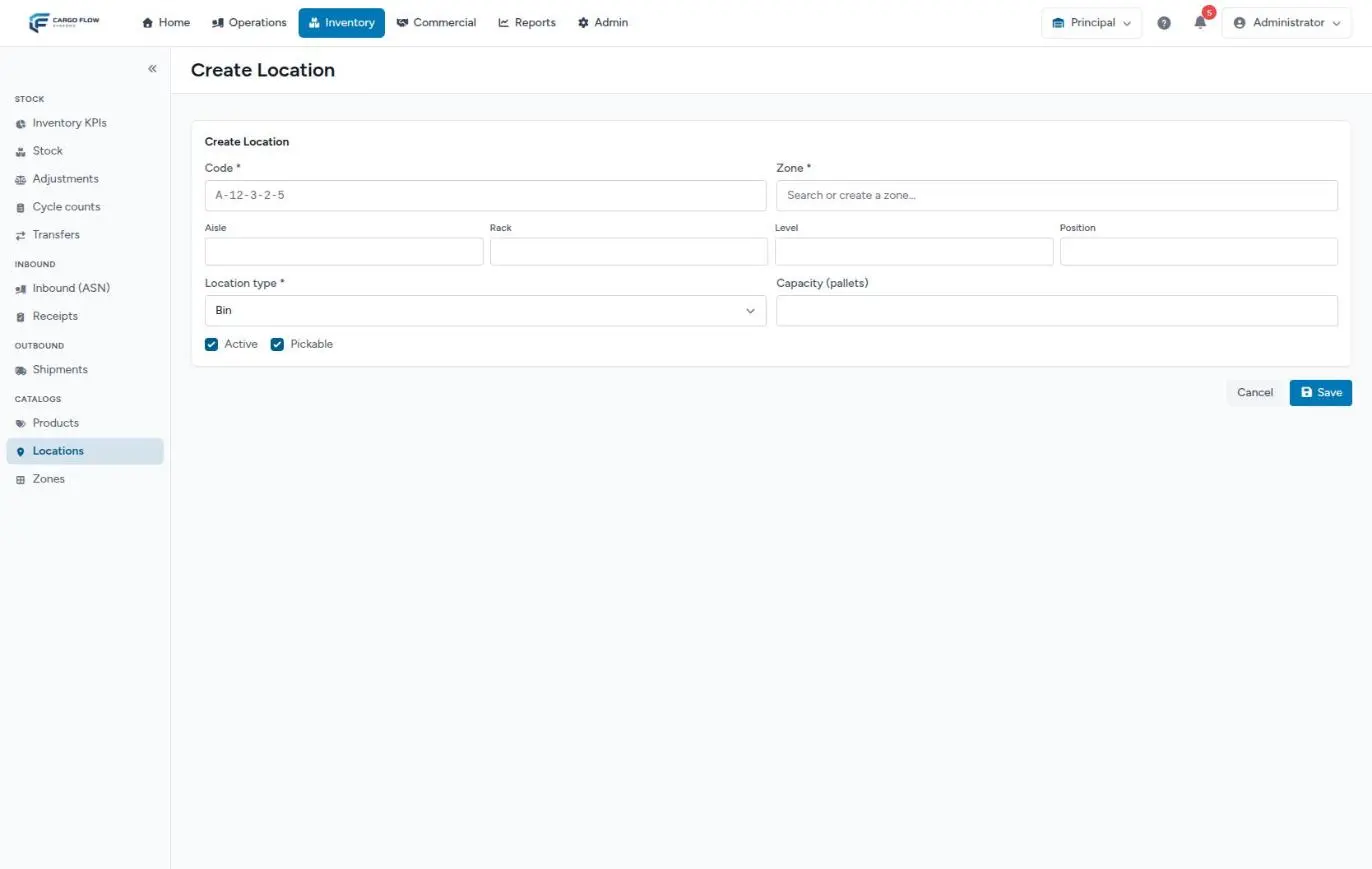
- Code (required) — up to 64 characters, unique in the warehouse. We recommend building it as zone-aisle-rack-level-position, for example
A-12-3-2-5. It is what the operator reads and scans. - Zone (required) — search it by name; if it does not exist, the same search offers to create it. Only active zones are offered.
- Aisle, Rack, Level and Position — optional, up to 16 characters each. They help sort and find.
- Location type (required) — Bin (the default), Floor, Dock door, Staging or Pallet position.
- Capacity (pallets) — how many pallets fit, zero or more. Optional.
- Active and Pickable — both come ticked.
- Save — when creating, you stay on the new location’s edit screen. When editing, you return to the list.
How they affect put-away and picking
- At receiving, each receipt line is stored in the location chosen by whoever captures it: the supervisor’s capture and the operator app both offer the warehouse’s location list. Today there is no automatic suggestion on screen; a good code scheme is what makes the list easy to use.
- When a shipment reserves, the system only takes goods from locations that are active, pickable and not of type Staging. Clearing “Pickable” on a reserve location keeps shipments from taking goods from it.
- In adjustments and status changes, the location search offers only active locations. Transfers offer all of them.
- In cycle counts, a zone plan creates tasks for every location in that zone that holds goods, active or not.
- In billing, nightly storage counts goods in every location except the cross-dock one. See How charges are generated.
Pallet capacity
When a location has a capacity, every receipt, positive adjustment or transfer that would exceed it leaves a yellow notice on the next screen: it names the location, the pallets it would hold against the declared capacity, and says the operation was recorded anyway. It never blocks.
To turn pieces into pallets, the system uses each product’s pallet level, rounding up per product. A product with no pallet level counts every piece as a pallet, which produces false warnings; see Products and packaging levels.
Example: setting up an aisle
You are opening aisle 12 in zone A: 4 racks, 3 levels, 2 positions per level, one pallet per position.
- Confirm zone
Aexists (Storage, active). - Create the 24 locations
A-12-1-1-1throughA-12-4-3-2, type Pallet position, capacity 1. - Level 1 of each rack will be a customer’s reserve: on those 8 locations clear Pickable.
- Create
A-12-FLOOR, type Floor, no capacity, for goods passing through.
Result: the inventory dashboard gains 25 free locations, shipments pick from 16 positions and the floor, and if someone puts two pallets in A-12-2-1-1 they will see the over-capacity notice.
Deactivating and deleting zones and locations
- Deactivating (clearing Active) is the safe way to retire a location: it keeps its history and stops being offered in adjustments and reservations.
- A location with stock cannot be deleted; the message says it has stock.
- Bulk delete of locations — tick several and use Delete selected. Locations with stock, movement history or reservations are skipped; the message says how many. With a filter on, the header checkbox selects every location matching it.
- A zone cannot be deleted while it has locations, even inactive ones. In a bulk delete, zones with locations are skipped.
The cross-dock zone and location
The cross-dock module creates an XDOCK zone and an XD-STAGE location per warehouse on its own. Goods that come in and go out without being stored pass through them; they are not pickable so regular shipments do not take them, and storage does not charge them. In the lists their type shows as technical text instead of “cross-dock”; it is a pending translation detail. Do not edit or delete them. See How a cross-dock is done.
Best practices
- Define the code scheme once and apply it across the whole warehouse; print labels with the same code.
- Create zones and locations before a customer’s first receipt.
- Mark reserve, quarantine or returns locations as not pickable.
- Enter pallet capacity where space is critical: over-capacity notices only appear when a capacity exists.
- Deactivate, rather than delete, locations that have already been used.
Troubleshooting
The zone does not appear when creating a location.
- The zone is inactive. Activate it under Inventory › Zones, or create it from the same search.
“Cannot delete location with stock.”
- It has stock. Transfer it to another location and try again, or deactivate the location.
Deleting an empty location shows an error page.
- It had movements. Deactivate it (see the note above).
“Cannot delete zone with active locations.”
- It still has locations, even inactive ones. Move them to another zone or delete them first.
A shipment does not reserve goods that are in the location.
- Check the location is active, pickable and not of type Staging.
The over-capacity notice appears for an almost empty location.
- The product has no pallet level, and its pieces are counted as pallets.
The location search does not find a code.
- Type it with the same capitalization it was saved with.
Frequently asked questions
Does capacity stop me from overfilling?
No. Pallet capacity only produces a notice when exceeded; the movement is recorded anyway.
Can I change the code of a location that holds goods?
Yes, as long as the new code does not already exist in the warehouse. The goods and their history stay with the location; only its name changes. Reprint its label.
Can I move a location to another zone?
Yes: edit it and change the zone. The goods stay in the location; zone filters and zone counts will pick it up in the new zone.
Need help?
If something did not work as expected, our support team can help you.
Was this article helpful?